Showing posts with label Coconut. Show all posts

Tuesday, July 29, 2014

Cake of the Week: Coconut Oil Lemon Bars


Lemon bars are one of my favorite summer desserts. The only downside is that if you try to take them places in Tupperware they tend to melt into a sticky mess. So these bars seek to solve that—thanks to their more solid cookie crust, they’re a more easily transportable twist on the usual recipe. I made them with homemade lemon curd, which is pretty much substance of the gods that I want to eat on a spoon always. Plus the coconut oil in the crust gives them a special hint of extra richness and flavor.

And for the record, I’m officially obsessed with coconut oil. The many uses of this magical substance have been well-documented, so no need to get into them here—let’s just cut to the chase and talk about its utility as a baking ingredient.


I haven’t thoroughly experimented with coconut oil as a straight substitute for butter, but apparently it can be used as your oil of choice in many recipes. It has a lower melting point than butter, so while it works well in bars and brownies and cookies, I haven’t seen it used as much in cakes.  And for those of you who care, it’s vegan and paleo and a lauric acid, which may or may not be good for you, but is probably not any worse for you than other oils/butters/fats. The important part (to me) is that it’s delicious—coconut oil adds a nice hint of vanilla-y coconutty flavor to whatever you’re making.


The dough looked dangerously shiny and potentially not quite right, and as I put them in the oven, I was concerned that the bars would turn into some sort of sticky disaster. But nope! They turned out perfect! And came out of the pan so easily—ready to be packed up and taken to a picnic.

Coconut Oil Lemon Bars

Crust Ingredients:
  • 1 1/2 cups all purpose flour
  • ½ cup whole wheat flour
  • 1/4 teaspoon salt
  • 1/4 teaspoon baking powder
  • 1/2 cup coconut oil, at room temperature
  • 1/2 cup packed light brown sugar
  • 1/4 cup granulated sugar
  • 1 large egg
  • 1/2 teaspoon vanilla extract
  • 1/2 teaspoon coconut extract
Lemon Curd Ingredients:
  • 3 large eggs
  • 3/4 cup granulated white sugar
  • 1/4 cup fresh lemon juice (2-3 lemons) (do not use the bottled lemon juice)
  • 3 tablespoons unsalted butter at room temperature
  • 1 tablespoon finely shredded lemon zest

Directions:
  1. For the curd: In a small saucepan over medium-low heat, whisk the eggs, sugar, and lemon juice until blended. Cook, stirring constantly (to prevent it from curdling), until the mixture becomes thick (like sour cream or a hollandaise sauce). This will take approximately10 minutes.
  2. Remove from heat.
  3. Cut the butter into small pieces and whisk into the mixture until the butter has melted. Add the lemon zest and let cool.
  4. The lemon curd will continue to thicken as it cools. Cover immediately with plastic wrap (so a skin doesn't form) and refrigerate for up to a week. This recipe yields approximately 2 cups of curd, so you will have some leftover (yay you win!).
  5. For the bars: Preheat oven to 350 degrees F. Grease an 8- or 9-inch square baking dish with cooking spray. Set aside.
  6. In a medium bowl, cream coconut oil and sugars until light and fluffy, about 2-3 minutes. Add the egg, vanilla extract, and coconut extract. Mix well. Mix in the flours, salt, and baking powder until combined.  
  7. Gently press ¾  of the dough into bottom of prepared baking dish. Evenly spread approximately one cup of the lemon curd over dough. Use your hands to flatten pieces of remaining dough and spread it over the top, almost covering all the curd.
  8. Bake for 25 to 30 minutes or until the top is golden brown. Cool completely and cut into squares.


Tuesday, April 23, 2013

Cake of the Week: Raspberry Coconut Layer Bars


Friday, if you recall, was kind of a stressful everything-is-terrible-and-sad sort of day. And from my perspective, there is only one reasonable and constructive way to respond to this – bake something amazing!


I always find baking relaxing. It requires enough thought and focus that you really can’t multitask it without running the risk of accidentally forgetting baking soda, or switching salt for sugar, or ooh whoops that was supposed to be 300 degrees and not 375??? It is active and yet not challenging (unless you’re whipping that cream by hand), and it results in something edible and hopefully delicious to share.


With Boston news on in the background, and thunder and lightning and tornado-style wind outside my windows, I calmly cracked a can of sweetened condensed milk, took out my aggression crushing a sleeve of graham crackers, and layered up these bars that may sound like too much, but trust me they are just right.

Let’s talk about the layers: graham cracker crust, coconut and sweetened condensed milk, raspberry jam, toasted almonds, and semi-sweet chocolate.


Like I said, these are intense little bars of awesomeness, and come with a hefty warning: FOR SHARING. I may or may not have eaten 4 on Saturday alone (breakfast, post-lunch, post-dirt biking, dessert – nothing makes a crushed foot feel better like coconut!).

On a scale from one to you-will-not-regret-these, go make them NOW. If someone would be so kind as to deliver a can of sweetened condensed milk to my door, I would make another batch immediately…

Raspberry Coconut Layer Bars

Printable recipe.
Recipe adapted from The Cutting Edge of Ordinary
Ingredients: 
  • 1 2/3 cup graham cracker crumbs (1 sleeve of graham crackers, crushed)
  • ½ stick butter (melted)
  • 1 tablespoons sugar
  • 3 cups sweetened flaked coconut
  • 1- 14oz can sweetened condensed milk
  • 1 cup seedless raspberry jam (about half a jar – up to you how much jam you want)
  • ¾ cup slivered almonds, lightly toasted in the oven
  • ½ cup semi-sweet chocolate chips (and/or white chocolate chips)
Jess: I wish I were that coconut/could install a can of SCM in my shower.
Directions: 
  1. Preheat the oven to 350 degrees. (To toast the almonds, I put them in a cake pan in the oven while it was preheating – if you do this make sure you check on them so they don’t burn.)
  2. Combine graham cracker crumbs, butter and sugar in a bowl. Press firmly into bottom of a greased and parchment paper-lined 7 x 11 inch pan (Ok so the original recipe says to use a 9 x 13 inch pan, but that just seemed too big so I went with something slightly smaller. You could also do a 9x9 and make them thicker and/or make a few extra mini ones in a cupcake pan). 
  3. Spread coconut over the top, and then pour sweetened condensed milk evenly over top. 
  4. Bake for 25 minutes, or until lightly browned. Cool completely on wire rack. 
  5. Spread jam over cooled top, sprinkle with nuts. 
  6. Melt the chocolate chips in a small bowl in the microwave for 30 seconds and then at 10 second intervals until just melted. I used a fork to drizzle the chocolate over the bars. 
  7. Cool completely before cutting. 
  8. Welcome to your newest addiction!


Printable recipe. 

Tuesday, August 21, 2012

Cake of the Week: Key Lime Cake with Coconut Caramel

If I went on a fabulous beach vacation, this is what it would taste like. Key limes and coconut and awesomeness. I can picture the palm trees swaying, hear the waves crashing on the beach, the sun and the sand and a drink in my hand (oh wait, did this just become a Kenny song? Yes it did…) 


All summer people have been asking me if I have any trips planned (it's one of those stock in-the-office-kitchen questions, right after asking how your weekend was and commenting on the weather). NO I DO NOT. Alas, I’m just here in DC for the summer…but at least I can still taste what a beach vacation feels like, right? I’ll take a piece of this cake, hit up the public pool, close my eyes and imagine myself on a nice sandy strip of ocean. Done. 


(Though, I don't feel tooo bad for me -- I did go to Costa Rica back in January.)


I’ve made a version of this cake recipe before and I can promise you that it is DELICOUS. Seriously, a whole half-cup of lime juice in just one layer of cake = flavorful and amazing. 

It's fancy and fantastic as a layer cake, but for just Mollie/SpeedyKate weeknight consumption, one layer is enough. 


Key Lime Cake with Coconut Caramel 

Cake Ingredients:
  • 1 1/4 cups all-purpose flour
  • 1 cups granulated sugar 
  • 1/2 teaspoon baking powder

  • ¾ tsp. baking soda

  • 1/4 teaspoon salt

  • 1 large egg
  • 1/2 cup vegetable oil

  • 1/2 cup fresh or bottled key lime juice
(I used regular lime juice)
  • ½  cup sour cream
or Greek yogurt
  • 1 tablespoons fresh lime zest
  • Garnish: 1/4 cup shredded sweetened coconut, toasted
Caramel Ingredients:
Note: This caramel recipe makes about twice as much as you need...tupperware the extra caramel and make another cake later -- might I suggest the Cookie Butter Cake with Cashews and Coconut Caramel? 
  • 1 cup coconut milk, divided use
  • 1/3 cup brown sugar
  • 2 tablespoons corn syrup
  • 2 tablespoons butter
  • 1/8 teaspoon finely ground sea salt
Directions:
  1. Preheat oven to 350 degrees F. Spray and flour 1 9-inch round cake pan.
  2. Sift flour, sugar, baking powder, baking soda and salt together into mixing bowl. Add egg, oil and lime juice mix on medium speed of an electric mixer until creamy. 
  3. Add sour cream/Greek yogurt and zest -- mix until smooth. 
  4. Pour cake batter into your pan and bake for 25 to 35 minutes or until a tooth pick comes out clean.
  5. Cool in the pan for 10 minutes, and then turn the cake out onto cooling racks. Cool for 1 hour.
  6. Toasted Coconut: Spread on baking sheet and bake in a pre-heated 375 for about 5-10 minutes. Stir often. Let cool. I like to cook mine until some of the coconut is lightly browned.
To make the caramel sauce:
  1. Bring to a boil over medium heat: 1/2 cup coconut milk, brown sugar and corn syrup in a medium saucepan.
  2. Boil, without stirring, until caramel reaches 236 degrees (soft ball stage).
  3. Remove pan from heat and whisk in remaining coconut milk, butter and sea salt.
When the cake is completely cool, pour coconut caramel on top and sprinkle with toasted coconut. 


Slice, serve, then pretend you're on a beach and enjoy!

Tuesday, August 7, 2012

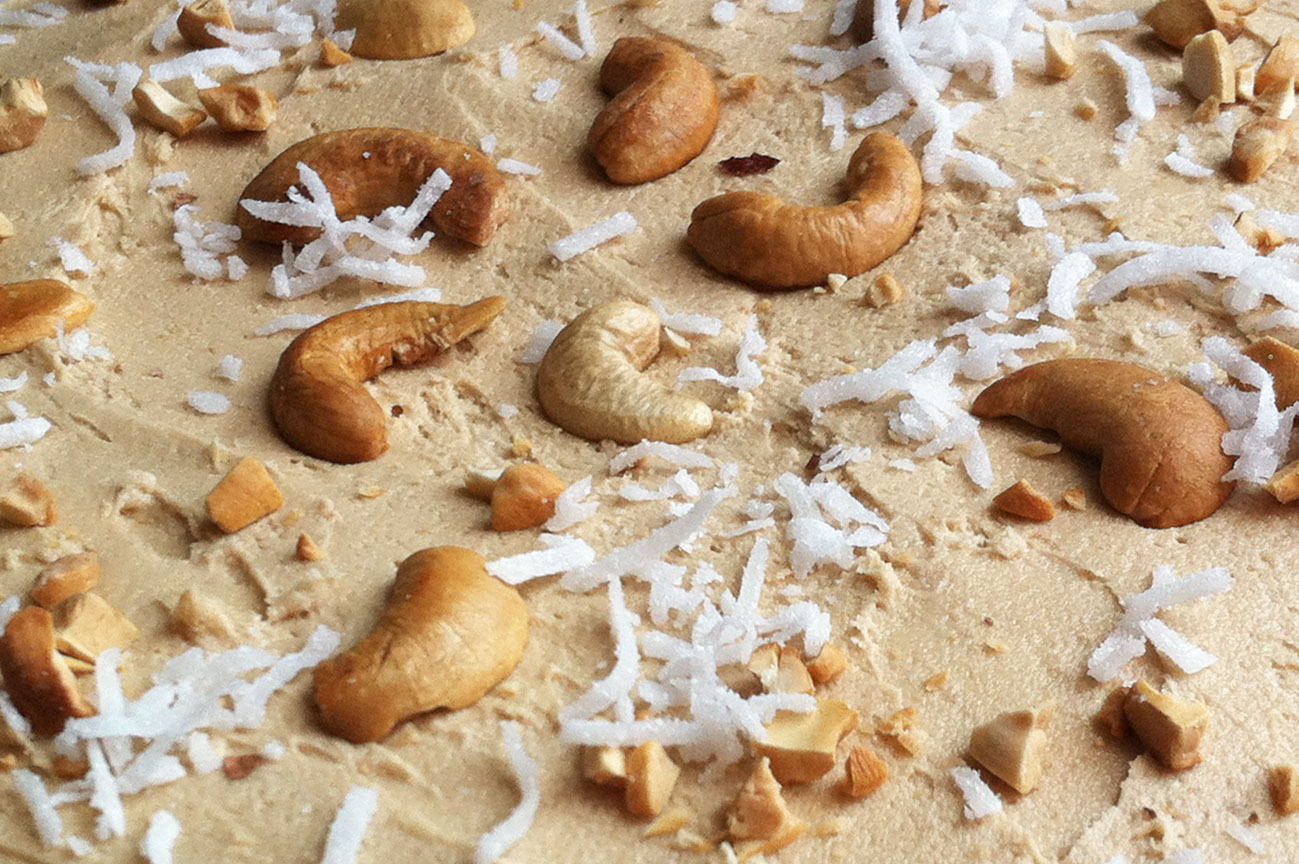
Cake of the Week: Cookie Butter Cake with Cashews and Coconut Caramel


I am probably one of the last food bloggers to board to Cookie Butter train, and there is a reason for that. I’ve certainly heard of it. It's taunted me from the shelves of Trader Joe’s and from the recipes popping up on my Reader. But sometimes, with some foods, I just have to say no. That is, until one of my best friends in the whole world requests it for her birthday. Then I say YES.


So let’s talk about Cookie Butter (aka Speculoos, aka Biscoff Spread) for a minute. It tastes like ginger snaps but has the texture of peanut butter. That may sound weird to the uninitiated, but holy Cookie Butter!, I am absolutely never allowed to buy this again. I spend way too much time in a bathing suit for this to be a recurring food product in my life  –  I need to bake it into more things so it stops looking at me every time I open my cabinet.


You may wonder, what do you eat it on? Umm I’m assuming you mean things other than my fingers...a spoon then? No really, Cookie Butter would go well on anything that is good with peanut butter or Nutella. I'm thinking Cookie Butter crepes, Cookie Butter on toast/muffins/bagels. Cookie Butter baked into cookies…or spread on cookies. Seriously, I don’t think the how will be your problem, it will be how to stop.


This Cookie Butter Cake with Cashews and Coconut Caramel has a lot of things going on, but since it’s only one layer, it doesn’t actually seem that intense (see what I did there? rationalization = one of my many talents.) If you so choose, I think you could even skip the caramel part and just go for the cake with frosting. OH MAN the frosting!!!

Cookie Butter Cake with Cashews and Coconut Caramel

Recipe from Sugar Plum.
Printable recipe. 
Cake Ingredients:
  • 3 tablespoons unsalted butter, softened
  • 3 tablespoons Cookie Butter or Biscoff Spread
  • 1/2 cup granulated sugar
  • 1 large egg
  • 1 teaspoon vanilla extract
  • 1 1/2 teaspoons baking powder
  • 1/2 teaspoon baking soda
  • 1/4 teaspoon salt
  • 1 1/2 cups all-purpose flour
  • 3/4 cup coconut milk
  • 1/2 cup finely chopped toasted cashews
  • 1/2 cup sweetened flaked coconut
Caramel Ingredients:
Note: This caramel recipe makes about twice as much as you need...tupperware the extra caramel and make another cake later!
  • 1 cup coconut milk, divided use
  • 1/3 cup brown sugar
  • 2 tablespoons corn syrup
  • 2 tablespoons butter
  • 1/8 teaspoon finely ground sea salt 
Frosting Ingredients:
  • 2 tablespoons unsalted butter, softened
  • 2 tablespoons Cookie Butter or Biscoff Spread
  • 1 cup confectioners' sugar
  • 1 tablespoon milk
  • 1/2 teaspoon vanilla extract
Directions: 
  1. Preheat oven to 350 degrees F.  Spray and flour a 9-inch round cake pan. 
  2. In a large mixing bowl, beat  butter, cookie butter and sugar until creamy - about 1 minute.  
  3. Add in the egg, vanilla, baking powder, baking soda and salt, and beat until well combined.  
  4. Alternate adding in flour and coconut milk (flour, coconut, flour, coconut, flour), and mix until just combined. Finally, mix in cashews and coconut. 
  5. Pour batter into prepared pan and bake for 25 minutes, or until golden brown and cake begins to pull away from the sides of the pan.  Cool 10 minutes in the pan before running a knife around outside edges and turning onto a wire rack to finish cooling.

To make the caramel sauce:
  1. Bring to a boil over medium heat: 1/2 cup coconut milk, brown sugar and corn syrup in a medium saucepan.
  2. Boil, without stirring, until caramel reaches 236 degrees (soft ball stage).  
  3. Remove pan from heat and whisk in remaining coconut milk, butter and sea salt.  
  4. Using a fork, poke a generous amount of holes into the top of the cake, and pour caramel on top.  
To make the frosting:
  1. Beat all the ingredients together until smooth. Add more milk or sugar as necessary to reach a spreadable consistency.  

Frost the cake, decorate with coconut and cashews, transport to your friend’s house, cover in candles, sing Happy Birthday, and enjoy!

Printable recipe. 

Tuesday, April 17, 2012

Cake of the Week: Salted Coconut Maple Oatmeal Cookies

This weekend I learned a new term from my very smart finance friends: Alpha. 


For funds and investments and other money things that are far over my head, it means, “The excess return of the fund relative to the return of the benchmark index for a fund,” and/or, “a measure of an investment’s performance over and above the performance of investments of the same risk.” 

In normal person (super-duper simplified) terms it could be described as extra value added or something performing above expectations. 


So what does this have to do with cookies? Well an oatmeal cookie is good. But an alpha oatmeal cookie performs above and beyond, taking the expected result and making it better. This weekend, in the context of these Salted Maple Coconut Oatmeal Cookies, Jess and I combined our alphas. 


She added the maple, and I added the knowledge that you can half the butter (leading to “healthier” cookies…or you can just eat twice as many). And her boyfriend Zac added the kosher salt component, taking these cookies to a whole new level of awesomeness. And the resulting cookies were aaammmaaazzziiinnnggg. 


Lesson conclusion: Alpha + alpha + alpha = yum. 

Salted Maple Coconut Oatmeal Cookies

This is a half recipe that makes about 24 normal-sized cookies. You can easily double it for a full batch. (Printable recipe.)

Ingredients:
  • 1/4 cup (1/2 stick or 2 ounces) butter, softened
  • 2/3 cup light brown sugar, packed
  • 1 egg
  • 1/8 cup water
  • 2 tablespoons maple syrup
  • 1/2 teaspoon vanilla extract
  • 3/4 cup all-purpose flour
  • 1/2 teaspoon baking soda
  • 1/2 teaspoon ground cinnamon
  • 1/4 teaspoon salt 
  • 1 1/2 cups rolled oats
  • ½ cup shredded coconut
  • 1 cup milk chocolate chips
  • Kosher or sea salt for sprinkling on top

Directions:
  1. Preheat oven to 350°F.
  2. In a large bowl, cream together the butter, brown sugar, egg, maple syrup, and vanilla until smooth. Mix in the water. 
  3. In a separate bowl, whisk the flour, baking soda, cinnamon and salt together. Stir this into the butter/sugar mixture. Stir in the oats, coconut, and chocolate chips. 
  4. Chill the dough for 15-30 minutes (if you have the patience. It won’t be the end of the world if you don’t chill, but chilling softens the oats a bit which is definitely a good thing). 
  5. On a silpat of greased or parchment-lined baking sheet, scoop out cookie dough in 1-2 tablespoonful sized balls. Using your hand, flatten the balls just a little (since this recipe has less butter, they won’t spread very much). Sprinkle with kosher or sea salt. 
  6. Bake them for 10 to 12 minutes, taking them out when golden at the edges but still a little undercooked-looking on top. 
  7. Let them sit on the hot baking sheet for five minutes before transferring them to a rack to cool.


Tuesday, April 3, 2012

Cake of the Week: Presidential Sweet Cookies

There’s a certain bakery here in DC that I kinda sorta absolutely adore. Their muffins, coffee, and plate-sized cookies get me every time. The cookies especially (well duh). They make all sorts of combinations, ensuring that when I walk in mid-work day, looking for a treat, I’m bound to need a minute to contemplate the options. 


And conveniently, everywhere I frequent seems to be near a Firehook location! There’s one  around the corner from my house, one at Farragut Square (a couple blocks away from my old job at NatGeo), and one at Metro Center (umm hello where I’ll be this afternoon!).  

A couple weeks ago I made the very good choice of the Presidential Sweet Cookie. It has:
  • chocolate chips,
  • dried cherries,
  • pecans,
  • coconut,
  • and a tiny bit of espresso powder. 
YES PLEASE. (The Firehook cookie also has oatmeal, but I managed to completely forget the oatmeal when I made my version of the recipe, so mine is oatmeal-less). 


Legend has it that the Presidential Sweet got its name because then-First Lady Hillary Clinton and Chelsea were fans. The owners won’t confirm or deny the White House connection, and really, legitimately presidential or not, they’re delicious! And I will warn you: dangerously addicting.  

Presidential Sweet-Inspired Cookies
  • ½ cup (1 stick) unsalted butter, softened to room temperature
  • ½ cup plain applesauce*
  • 1 cup brown sugar
  • ½ cup sugar
  • 2 eggs
  • 1 teaspoon vanilla
  • 1 teaspoon baking soda
  • ½ teaspoon salt
  • 2 ¼ cups flour
  • ½ teaspoon espresso powder
  • ½ cup chopped toasted pecans
  • ½ cup shredded coconut (I used sweetened, but you could do unsweetened if you prefer)
  • 1 cup chocolate chips
  • ½ cup dried cherries, chopped

  1. Pre-heat your oven to 375 degrees.
  2. Beat softened butter and sugars until creamy and smooth, then beat in vanilla and eggs. 
  3. Add dry ingredients (salt, baking soda, flour, and espresso powder) to the mixture and stir until combined. 
  4. Add fun stuff: pecans, coconut, chocolate chips, and cherries.
  5. Using two spoons, drop  2 tablespoon-full sized balls on a cookie sheet.** These cookies don’t spread much on their own, so you may want to flatten the balls out a bit.
  6. Bake 8-10 minutes and cool on a wire rack. 


*The applesauce makes these puffier cakier cookies. Alternately, you could do 2 sticks of butter and omit the applesauce for a chewier cookie.
**You could make these Firehook-sized if you want (i.e. BIG). Make each cookie about 1/3 cup of dough, and bake 10-12 minutes. Cool on the pan until they seem stable enough to remove to a wire rack. 


Tuesday, February 7, 2012

Cake of the Week: Caramel Oatmeal Bars

I had to wear a retainer for a year when I was in first grade. It wasn't the keep-your-teeth-straight-after-braces kind, but the permanent kind that no one can really see unless you open your mouth yawning-monkey style and lean back. 


So anyway, the major downside was that I was forbidden from eating super-sticky things like gum and caramel for a year (which felt like forever to my six-year-old candy-loving self).

On Halloween I could eat the chocolate, but the Sugar Daddys, caramels, Sugar Babies, etc. were strictly off-limits. Sister1 (the savvy businesswoman) set up trades for these coveted confections to ensure that my teeth remained retained and she secured the sugar. 

But I was a conniving child too, and one day when she was at swim practice I snuck in to raid her stash. 


Caramel! Mine! I popped the chewy goodness into my mouth, and a few chews later  - “POP!” - my retainer popped out. 

Uhoh. I looked left, looked right, and quickly slid the offending mouth metal under the bathroom soap dish. Problem solved, I grinned with glee. I was free to consume all the caramel I could! 

Fast-forward one month:
Mama: Mollie! Is this your retainer? What’s it doing here???
Mini-Mollie: Ummmmmmm, it came out?

Caught. And that was the end of my caramel fun for the rest of the year…it was sweet while it lasted.


My retainer is long-gone, and I still love caramel. I made these bars for a Super Bowl party this weekend (you need something sweet to temper the saltiness of all other Super Bowl snacks). And these are SWEET. 

They’re Caramel Oatmeal Bars with Chocolate, Walnuts, and Coconut. Pretty intense and pretty awesome. 


Caramel Oatmeal Bars (recipe adapted from these Turtle Bars on The Curvy Carrot)
Servings: 24-40 bars (depending on how big you want them)
Ingredients
For the bar topping and base:
  • 1 and 1/2 cups all-purpose flour
  • 1/4 teaspoon salt
  • 3/4 teaspoon baking soda
  • 1 cup firmly packed dark brown sugar
  • 1 and 3/4 cups rolled oats
  • 3/4 cup (1 1/2 sticks) unsalted butter, melted
  • 1 cup toasted walnuts, chopped into large pieces
  • 1/2 cup mini chocolate chips
  • 1/2 cup toasted coconut

For the caramel filling:
  • 1/2 cup firmly packed light brown sugar
  • 10 tablespoons ( 1 and 1/4 sticks) unsalted butter, cut into cubes
  • 2 tablespoons heavy cream

Instructions
  • For the bar topping and base: Preheat the oven to 350 degrees.
  • Butter the sides and bottom of a 9-by-13-inch glass or light colored metal baking pan.
  • Line the pan with parchment paper or tin foil so that the paper overhangs the pan on two sides.
  • Butter the parchment/foil.
  • In a medium bowl, whisk together the flour, salt, and baking soda.
  • Use your hands to rub in the brown sugar.
  • Add the oats and stir until the ingredients are evenly combined.
  • Make a well in the center of the dry ingredients, then pour in the melted butter and stir until the entire mixture is wet and combined.


  • Spread two-thirds of the mixture across the bottom of the prepared pan and bake for 12 minutes.
  • Remove the pan from the oven to cool (but leave the oven on).
  • Sprinkle the walnuts, chocolate chips, and coconut across the cooled crust.

For the caramel filling: 
  • In a medium saucepan over medium-high heat, melt the sugar and butter together.
  • Bring the mixture to a boil and boil for 1 minute, stirring constantly (the caramel will begin to darken at this point).
  • Remove the pan from the heat, stir in the cream, and pour the caramel directly over the chocolate pecan layer.
  • Use an offset spatula to evenly distribute the caramel.
  • Sprinkle the remaining oatmeal mixture onto the caramel and bake for 10 to 12 minutes, or until the top is golden brown.

  • Let the bars cool in the pan for about 15 minutes, then place the pan in the refrigerator and chill for 1 hour to firm up.
  • Cut and serve. The longer you wait, the better they cut. 


Tuesday, January 24, 2012

Cake of the Week: Chocolate Coconut Cake

We’re having a freakishly mild winter here in DC. Though I like wearing my medium-weight coat, running outside, and avoiding the misery of frozen toes and nose, I miss the snow! 


I love how it looks in the city, and how it feels falling out of the sky, and the way OPM freaks out and gives us snow days (flashback to 2010 –Snowmageddon + Snoverkill = best week ever.). Plus I really really really want to go skiing. And mountains sans snow are just not as much fun. 


So consider this my snow-dance cake (much like rain dancing, but drier).  I made it two weekends ago, in a fit of boredom and wanting-cake-dom. It’s a Vegan Chocolate Cake with Coconut Cream Cheese Frosting, and toasted coconut on top to give it a snowball look and tropical crunch. Yummmm. 


Followers may notice that I've made this vegan chocolate cake a few times before (why vary perfection?). This time around I halved the recipe to make a smaller cake.  

Vegan Chocolate Cake
Makes one to two three 8 or 9-inch round cakes
  • 1 1/8 cups organic all-purpose flour
  • 1 cups sugar
  • 11/2 cup unsweetened cocoa powder
  • 1 teaspoons baking soda
  • 1/4 teaspoon salt
  • 2 teaspoons vanilla extract
  • 1/3 cup canola oil
  • 1 teaspoons white vinegar
  • 1 cups cold water

  1. Preheat oven to 350 degrees F.
  2. Line two 9” round pans with parchment paper. (Warning: This recipe tends to stick, so I strongly suggest you go for the parchment paper.)
  3. In a large bowl, sift the dry ingredients together. Set aside.
  4. In a medium bowl, whisk together the oil, water, vanilla extract and vinegar.
  5. Slowly whisk the wet ingredients into the dry ingredients being careful not to over-mix. The mixture will be quite wet, but that's ok.
  6. Pour the batter into the pans evenly. Bake for 25-30 minutes or until a toothpick or knife inserted into the center comes out clean.
  7. Cool in the pan for 10 minutes then remove from pan and cool on a wire rack for 30 minutes. I recommend putting cakes in the freezer for an additional 30 minutes before frosting the cake, it will make them easier to handle.

Coconut Cream Cheese Frosting
  • 8 oz (one block) cream cheese
  • ¼ cup (1/2 stick) butter
  • 3 cups powdered sugar
  • 1 teaspoon coconut extract
  • 2-4 tablespoons milk, as needed 

  1. With an electric mixer, cream the cream cheese and butter for 5 minutes.
  2. Blend in  powdered sugar.
  3. Blend in rest of ingredients. Add more milk or powdered sugar as necessary to reach desired consistency.

Coconut Topping
  • 1 cup sweetened shredded or flaked coconut

  1. Preheat broiler. Spread coconut on cookie sheet and broil until slightly brown. (Warning: watch the coconut, it burns very quickly!)
  2. Cool completely.

Frost cake, then cover in toasted coconut, then THINK SNOW!


Monday, December 19, 2011

Cake of the Week: Mocha Coconut Fudge

Every year, my family’s Christmas dinner changes slightly. Sometimes it’s turkey, sometimes beef tenderloin. Sometimes we have roasted root veggies, sometimes green beans. Dessert could be a chocolate torte, pumpkin pie, cheesecake, or any variety of cookies. 


But one thing is constant: Auntie Robin’s Fudge. It’s a once-a-year thing that can only be once a year in the interest of special-ness and pants-fitting-ness. One particularly ridiculous year Sister2 ate something to the tune of 20 pieces of fudge! That girl is impressive. Or something.


Anyway, Auntie Robin’s Fudge is her thing, and I would not presume to re-create it for blogging purposes. But I did make my own fudge – a little more complicated, and (dare I say) a little prettier…Mocha Coconut Fudge. 


It probably won’t become a Mollie-family Christmas dinner staple (some people don’t like coconut or coffee…I know!), but it’s pretty freaking delicious. 


Mocha Coconut Fudge (From How Sweet It Is)
makes one 8×8 pan
  • 12 ounces semisweet chocolate, chopped
  • 12 ounces white baking chocolate, chopped
  • 1 can (15oz) sweetened condensed milk
  • 1 1/2 tablespoons espresso powder (or instant coffee)
  • 1 teaspoon vanilla extract
  • 1 1/2 teaspoons coconut extract
  • 1 tablespoon coconut oil (I didn’t have this and the fudge turned out ok)
  • 1/2 cup flaked coconut, toasted

Spray an 8×8 pan with non-stick spray.
  1. Add semisweet chocolate to a double boiler, and melt completely. 
  2. Once melted, add in half of the sweetened condensed milk, the vanilla, the coffee powder and 1/2 tablespoon of coconut oil. Stir with a spatula until combined and fairly smooth, then spread evenly in the bottom of the pan. Mixture will be thick. Place in the freezer for 30 minutes.
  3. Add white chocolate to a double boiler and melt completely. 
  4. Add in remaining condensed milk, coconut oil and coconut extract, stirring until combined. Remove fudge from freezer and add white chocolate on top, spreading evenly to coat. Top with toasted coconut, then chill in the refrigerator for 60-90 minutes.
  5. When ready to cut, fill a large cup with hot water. Dip a sharp knife into the water, then blot on a towel. Use knife to cut fudge into your desired size of squares.


Note: the melting can also be done in the microwave. I suggest melting the chocolate first on medium power in 30 second increments, stirring after each time. Once melted, add in remaining ingredients and stir until smooth. 


(Go here for the printable recipe.)