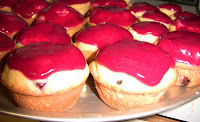
Showing posts with label cranberry. Show all posts

Tuesday, November 22, 2011

Cake of the Week: Cranberry Upside Down Cake

I’m on my way home!!! I have spent Thanksgiving many places –- at the homes of friends and families of friends -- in Boston, Virginia, and Niger. But this year I’m going home to California for the big Thanksgiving celebration for the first time since high school. And I am SO EXCITED. 


I love going home. It always involves excessive family time: shopping with my sisters, running with my dad, fighting over the cross-word with my mama (dibs for this week!). Plus, of course, some good quality Petaluma-style chilling: meandering downtown, taking our dog (Amy) for walks, losing myself in a book on my parents’ bed. All things good.


And this year, for the first time ever, my entire family will be together. That’s my immediate family, plus my cousins’ family, grandma, and aunt (all of whom we usually spend holidays with), PLUS  LLC’s family! YAY! My aunt will host the feast, so I don’t think I’m making anything for the big day.


(You may remember that I already put in my fair share of Thanksgiving cooking time.)


As you make your last-minute Thanksgiving plans, consider adding this super simple and insanely good Cranberry Upside Down Cake to your menu.


I made it for my feast, and no joke, one of the guests ate 4 pieces! He said it was the best cake he’s  ever had. I love when I get that kind of reaction...And this cake really was delish, I wish I’d made two!


Cranberry Upside-Down Cake (from Brown Eyed Baker)
Yield: 8 servings
Prep Time: 15 minutes | Bake Time: 30 minutes
  • 1¼ cups all-purpose flour
  • 1½ teaspoons baking powder
  • ¼ teaspoon salt
  • 8 tablespoons unsalted butter, at room temperature, divided
  • 1 cup granulated sugar, divided
  • ½ teaspoon ground cinnamon
  • ¼ teaspoon ground allspice
  • 1¾ cup fresh cranberries
  • 1 egg
  • 1 teaspoon vanilla extract
  • ½ cup milk

1. Preheat oven to 350 degrees F. In a small bowl, whisk together the flour, baking powder and salt; set aside.


2. Rub the bottom and sides of an 8-inch cake pan with 2 tablespoons of the unsalted butter (it will be a really thick layer of butter). In a small bowl, stir together ½ cup of the granulated sugar with the cinnamon and allspice. Sprinkle the mixture evenly over the bottom of the pan. Arrange the cranberries in a single layer on top of the sugar mixture.


3. Using an electric mixer, cream together the remaining 6 tablespoons of butter and ½ cup of granulated sugar on medium speed until light and fluffy. Add the egg and vanilla, and beat until well combined. Reduce the speed to low and add the flour mixture in three batches, alternating with the milk, until well combined.


4. Spoon the batter over the cranberries in the pan, and smooth the top. Bake until a thin knife inserted in the center comes out clean, 30 to 35 minutes. 


5. Let cool on a wire rack for 20 minutes. Run a knife around the edge of the cake; invert onto a rimmed platter. Store any leftovers at room temperature.


Tuesday, December 15, 2009

Cake of the Week: More is More Bars

A truely wise person once said, “Less is more.” And for the most part, I agree.

[Fun fact: that wise person was Robert Browning in his poem, "Andrea del Sarto” (aka the "Faultless Painter"), published in 1855.]

Less is more when Tim Gunn is mentoring a designer with “vision” on Project Runway.

Less is more when your enthusiastic karaoke-singing friend can’t hold a pitch.

Less is more in most decorating contexts (picture the interior of Versailles – and agree with me that Rococo is a bad idea for contemporary home decorating).

Less is more when we’re talking media-whores like Tiger Woods (literally), and Sarah Palin (figuratively).

 But sometimes, just sometimes, more is more. You know I’m referring to desserts here.

I see the argument for simple, basic, classic treats. And I enjoy those, I really do. But I often can’t resist adding more and more stuff to my baking adventures. (Remember my Caramel Apple Eggnog Cheesecake? Or my Maple Walnut Cranberry Cupcakes?)

I like to start with a base recipe, and then think…hmmm…what would make this better?

So this week, as I prepared for a few holiday parties, I started with a good-looking Snickerdoodle Blondie Bar recipe from Beantown Baker (Sidenote, in my mind, snickerdoodle = cream of tarter, which these bars don’t have, fyi).

And so I asked myself, what would make these more exciting?

The cranberries in my freezer. Yes.

And what goes well with cranberries?

Dark chocolate.

What else do I have in my fridge?

Cream Cheese. Egg.

A cheesecake layer on top?

Yes. Done. Genius.

(I'm not even kidding, that's how most of my interior dialogues actually go.)

 So here they are, Sinckerdoodle Cranberry Chocolate Cheesecake Blondie Bars (for simplicity's sake, let's just call them More is More Bars).

Here is the recipe for exactly what I did. But if you're going to make them, I think you should double the cheesecake topping.

Blondies:

2 2/3 cups all-purpose flour
2 teaspoons baking powder
1 teaspoon Kosher salt
2 cups packed brown sugar
1 cup butter, at room temperature
2 eggs, at room temperature
1 tablespoon vanilla extract
1 1/2 cups chopped fresh/frozen cranberries

1 3.5-4 oz bar dark chocolate, finely chopped

Preheat oven to 350F. Lightly grease a 9 x 13 inch pan.

Sift together flour, baking powder and salt and set aside. In large bowl, beat together butter, sugar, egg and vanilla until smooth.

Stir in the flour mixture until well blended. Add the chopped cranberries. Spread evenly in prepared pan (mixture will be somewhat cookiebatter-ish.)  Sprinkle dark chocolate over the top.

Cheesecake Topping:

1 package cream cheese

1 egg

1/3 cup brown sugar

1 teaspoon vanilla

3 Tablespoons milk

Beat with a mixer until smooth. Pour over unbaked blondies.


Bake 35-40 minutes or until cheesecake looks solid. Cool and then cut into bars. 

Enjoy!

Tuesday, December 1, 2009

Cake of the Week: Cranberry Maple Walnut Cupcakes

I’m a great guest. Invite me places – I’ll bring dessert!

Luckily my roommate had the Thanksgiving pies covered – I suffer from an irrational fear of pie crust and would rather write a cover letter than make one.

So with pies taken care of, I had some leeway to get creative. I went for the wow-factor and made these babies:

Cranberry Maple Walnut Cupcakes. This is a great holiday recipe – they look so festive, but they’re really not too difficult. Bring these to any holiday party – people will think you’re a kitchen goddess and no doubt invite you back soon! (Idea: you could do it with blueberries instead of cranberries and make Hanukkah cupcakes! It’d be a great flavor combo – blueberries + maple syrup = all I love about breakfast. If you try that, you may want to add a teaspoon of cornstarch to make sure the jam gels properly.)

So back to my cupcakes:

What makes them so delicious? Well, I love cranberries. A lot. As in, I eat dried cranberries every day, with almost every meal…what can I say? They’re good!

And in this context, the cranberry jam adds a nice tartness to the very sweet maple syrupy buttercream. I suppose you could pass on the cranberry jam part if you’re not that into cranberries…but that would kind of defeat the purpose of this whole recipe…

The cupcakes themselves are pretty dense – almost muffin-y. And just an FYI, they puffed up a lot, so don’t fill your muffin tins too full! Some of them were so rounded on top that I worried the cranberry jam would just slide off – thus I decapitated them (I know, I’m a cupcake murderer! Cruel and unusual treatment of bake goods? Guilty.) But I think that strategy worked really well, because then the cranberry jam could really soak into the cupcake.

I did the frosting in a “pastry bag” (aka I put it in a zip-lock and cut off the tip). You don’t have to do this, but it’s easy and makes them look really special.

And, another plus – they store really well. I froze a couple to save them for my friend who was away, and they actually defrosted quite nicely.

So here’s the recipe from Beantown Baker, with some of my own adaptations (in red).

 Cranberry Maple Walnut Cupcakes (adapted from Crazy about Cupcakes 

3/4 cup (1 1/2 sticks) unsalted butter, at room temperature
1/2 cup granulated sugar
1/2 cup maple syrup (use the real stuff!)
1 tsp vanilla extract
3 large eggs
2 cups all-purpose flour 

2 1/2 tsp baking powder
1 tsp salt
1/4 cup milk
1/2 cup chopped walnuts
1 cup chopped cranberries
Preheat over to 350F. Insert liners into a medium cupcake pan.

In a large bowl cream together the sugar and butter with an electric mixer on medium speed until fluffy, about 3-5 minutes. Beat in the maple syrup. Add the vanilla and eggs. Beat until mixture is smooth.

In a separate bowl mix the flour, baking soda, powder, and salt.

Add the flour mixture to the creamed mixture, alternating with the milk. Beat well. Stir in the walnuts 
and chopped cranberries.


Cranberry Jam
2 cups cranberries
1/3 cup sugar
water

Place remaining cranberries
and sugar in a saucepan. Add enough water to cover the berries.
Bring to boil. Reduce heat to low and cover for 20 minutes. Turn off heat and cover. Allow to simmer while cupcakes bake and cool.

When cranberry sauce is cooled, puree in food processor.  
NOTE: Make sure you puree them thoroughly, otherwise your jam will be seedy!

Maple Syrup Frosting 
6 Tbsp (3/4 stick) unsalted butter, at room temperature
3 1/2 cups powdered sugar
3 Tbsp maple syrup
2-ish Tbsp milk (as needed)
Cream butter and sugar until blended. Add maple syrup. Add milk as needed until frosting reaches desired consistency.

To assemble cupcakes:
Allow cupcakes to completely cool. Using a fork or toothpick, poke multiple holes into the cupcake tops.
Spoon some cranberry sauce onto the top of the cupcakes, coming close to the edge. Allow to soak in for 20 minutes.

Mix frosting while cranberry sauce is settling. Using a large tip, pipe frosting on to of sauce, but not covering all of the sauce.

So Beautiful!!!

Tuesday, September 22, 2009

Cake of the Week: Plum Ginger Upside Down Cake + Double Chocolate Cookies


To make up for the lack of baking last week, there has been quite a bit of culinary deliciousness going on in my world recently.


First of all, I made a Plum Ginger Upside Down Cake. I came across this recipe while Photograzing a couple weeks ago. Gingerbread? Yum. Plums? Yum. Carmelized sugar? Yumyumyum!!!


I first tried upside down cake at summer camp when I was in high school – just your standard pineapple upside down cake, probably (no, definitely) out of a box. And I LOVED it! I love how the sugar gets all carmelized on the top – no need for frosting, give me straight up sugar and cinnamon any day!


This was my first venture into upside down cake making, and I have to say that I am a huge fan. The cake looks super-elegant and complicated, but in reality is so freaking easy! I can’t believe I haven’t made upside down cake before. And they’re really versatile – pretty much any fruit would work with this recipe. I actually used black plums (which are yellow on the inside), and pluots – a plum/apricot hybrid that is pink inside. 

As you can tell by my excessive picture-taking, I think that plums are absolutely gorgeous. Such rich colors!

My Suggestions/Variations: 
- Do thick wedges of fruit – I sliced mine thin, and found myself wishing there was more fruit in my cake…
- I did not have fresh ginger, so I used a tablespoon of ground ginger. This may have been a bit too much – if you’re not huge into the ginger/molasses combo, you can go light on both.
- Also, the recipe says to cook it for over an hour – mine was done in 50 minutes!
- And one final tip, put your springform pan on a baking sheet – otherwise it may drip and cause the fire alarm to go of next time you preheat your oven…or maybe that’s just me…thank God the fire dept. doesn’t come every time my alarm goes off!

- Because this cake was so quick and easy, I would recommend making it the day you serve it – and eat it warm with vanilla ice cream. (And chocolate sauce – obviously!)


adapted from Leslie Mackie’s Macrina Bakery & Café Cookbook
serves 10

For the topping:
3 T unsalted butter @ room temperature
1/2 C light brown sugar
1 1/2 t ground cinnamon
4-5 medium to large ripe plums
For the cake:

4 oz unsalted butter @ room temperature
1/4 C + 2 T light brown sugar
1 T peeled, grated ginger
1 egg + 1 yolk
1/3 C molasses
1 1/2 C flour
3/4 t baking powder
3/4 t baking soda
1/4 t salt
3/4 C buttermilk

Preheat the oven to 325 degrees. Oil a 9" springform pan and line the bottom with a 10" circle of parchment paper (or tinfoil). You want a bit of the paper to come up the side of the pan.

Cut the plums into 1/2" slices. Melt the 3 tablespoons of butter, 1/2 cup brown sugar and cinnamon over medium heat for about 1 minute. Pour the mixture into the prepared springform pan, completely coating the parchment paper. Place the sliced plums on top of the butter-sugar mixture in overlapping circles so that none of the bottom of the pan shows through.

Sift together the flour, baking powder, baking soda, and salt.

Cream the butter and brown sugar on medium speed for about 5 minutes until it is smooth and pale. Add the grated ginger and beat 1 minute. Scrape down the sides of the bowl and add the eggs one at a time, beating on low speed and making sure that each egg is fully incorporated. Slowly pour in the molasses and mix thoroughly. The mixture will look like it’s breaking but it will come together when the dry ingredients are added.

Alternately add a third of the flour mixture and half the buttermilk to the batter, starting and ending with the flour. Finish the mixing by folding with a rubber spatula until the dry ingredients are just absorbed. Do not overmix. Pour the batter into the plum-lined pan and level the surface.


Bake for about 1 hour to 1 hour and 15 minutes or until a tester comes out clean. Let the cake cool in the pan for 10 minutes on a wire rack. Run a thin knife around the edges of the cake and release the sides of the springform pan. Cover the cake with a serving platter and carefully invert. Lift the bottom of the pan off the cake and gently peel away the parchment paper.

Here is a non-gingerbread variation:

If you’re wondering what else I made this weekend, I’ll give you a hint: Double Chocolate Cherry Cookies. (Ok, that wasn’t exactly a hint, but I have no patience for guessing games.)

 I made these for a church potluck this Sunday. That’s right, take a moment to imagine me in an apron carrying a plate of cookies – preferable with my hair in pin curls or some such ridiculousness – now say, “awww, how cute!”


Ok, moving on. These cookies were pretty amazing, and really chocolatey!

The recipe calls for ¾ cups dutch process cocoa – I only had ½ cup left, and that was plenty! Also, I substituted craisins for cherries, and added walnuts. Pretty freaking awesome! Make sure you take them out when they still look gooey, because you want them soft and chewy and brownie-ish. 

(I'm not going to lie - I'm eating one right now. With my coffee. It's breakfast.) 

Double Dark Chocolate Cherry Cookies
Slightly adapted from The Sweet Melissa Baking Book
1 cup all purpose flour (142 g)
3/4 cup unsweetened Dutch process cocoa powder
1 tsp baking soda
1/4 tsp salt
8 tbsp (1 stick) unsalted butter, softened
2/3 cup granulated sugar
1/4 cup firmly packed light brown sugar
1 large egg
1/4 tsp pure vanilla extract
3/4 cup semisweet chocolate chips or chunks
1/4 cup dried cherries, chopped

1. In a medium bowl, whisk together the flour, cocoa powder, baking soda, and salt.
2. In the bowl of an electric mixer fitted with the paddle attachment, cream together the butter, granulated sugar, and brown sugar until fluffy, about 3 minutes. Add the egg, mixing well. Stir in the vanilla.
3. With the mixer on low speed, add the flour mixture in three batches, mixing just until incorporated after each addition. Stir in the chocolate chips/chunks and cherries. Scrape down the sides of the bowl.
4. Turn the dough out onto a clean work surface and divide it in half. Roll out into 2 uniform logs, about 12 inches long. Wrap the logs in parchment paper or saran wrap. Refrigerate until firm enough to slice - a few hours. (You can freeze the logs tightly wrapped for up to 1 month.)
5. Position a rack in the top and bottom thirds of your oven. Preheat the oven to 350F. Line two cookie sheets with parchment paper or baking mats.
6. Cut the logs into 1 inch slices and place 1 1/2 inches apart on the prepared cookie sheets. Bake for 15 minutes, or until the dough looks just baked. These cookies should be tender, so do not overbake.

The cookies can be stored in an airtight container at room temperature for up to 3 days. For longer storage, refrigerate in an airtight container for up to 5 days, or freeze for up to 3 weeks. Do not uncover before defrosting.